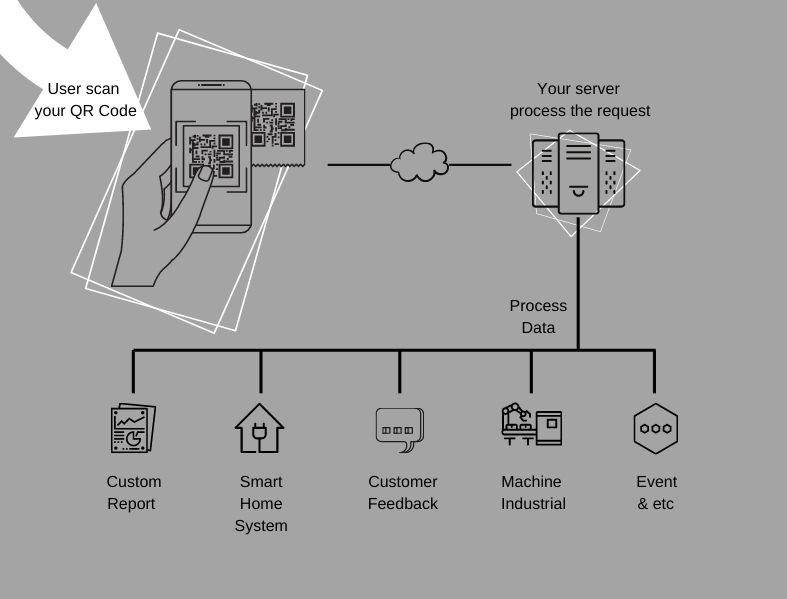
We are interested with QR Code. So we came up with infrastructure to support technology scan QR Code into everyday needs. We provide web form designer for QR Code generator and simple mobile apps that can be used by anyone. We help you collect data to be a report or send it to your own on-premise backend server so you can use it to trigger various fields of operation. Lets see what you can do in this picture.
This website is used to design forms and generate to unique QR code. And we also already have a mobile application that can be downloaded and used by users. To make it easier, you should first create a simple form in Dashboard, print the QR Code and look the default scan report.
We try to made the form designer as easy as possible. There are only three to four columns that you need to know about. Now, after you click tab Design, several columns will appear, input type, send to url and response type. Let's look the definition of each column below.
Input type column consists of two combobox options. First is called Scan Only and second is called Scan & Data Input. Each has different flow in displaying the form.
Scan Only ignores user input. When a user scan a QR Code, the mobile app usually display a form with several columns that must be filled then send the data to on premise server. If you choose Scan Only, the mobile app immediately sends data to the server without displaying the form.
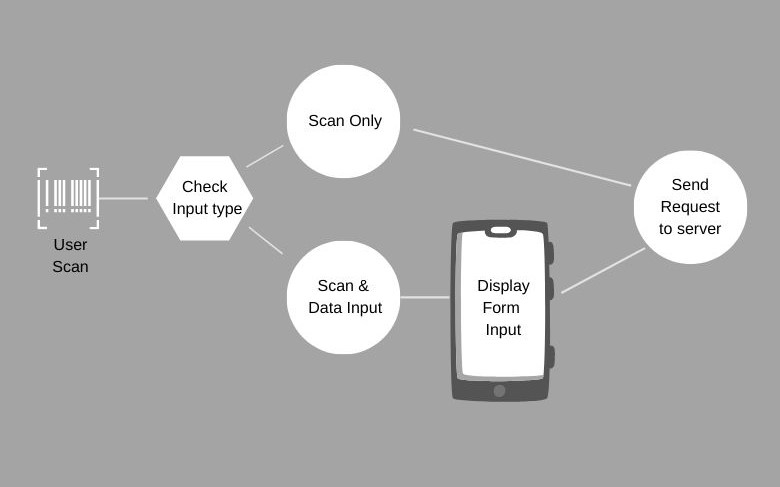
Scan & Data Input will check the form code first and generate layout for the user to start input. Form consists of several columns that can be defined. If you choose this option then make sure you add an input list so that the form appears properly.
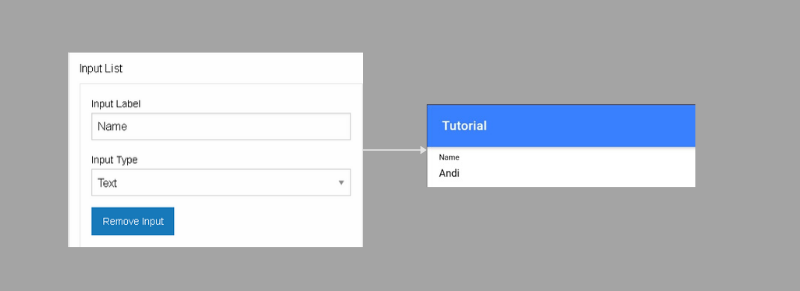
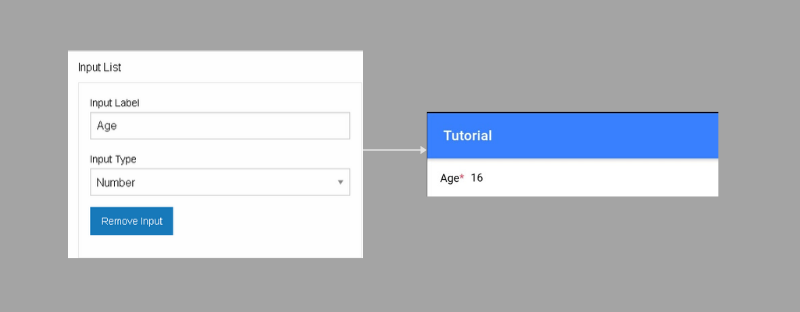
Input list can only be used if you choose input type Scan & Data Input. You can start creating input column by clicking Add Input button. When finished, don't forget to click Save button. There are several columns of input list, namely text, number, date, check and combo. Each column can be labeled with a name. Below is an explanation of each type:
Text is a column for typing manually for users. Text can contain alphanumeric as usual. Here is an example in the designer and form results in mobile apps.
Number is a column for typing manually for users. Number can contain numeric only. User will see the numeric keyboard when start typing. Here is an example in the designer and form results in mobile apps.
Date is a column for typing manually for users. User will see the date picker when start typing. Here is an example in the designer and form results in mobile apps.
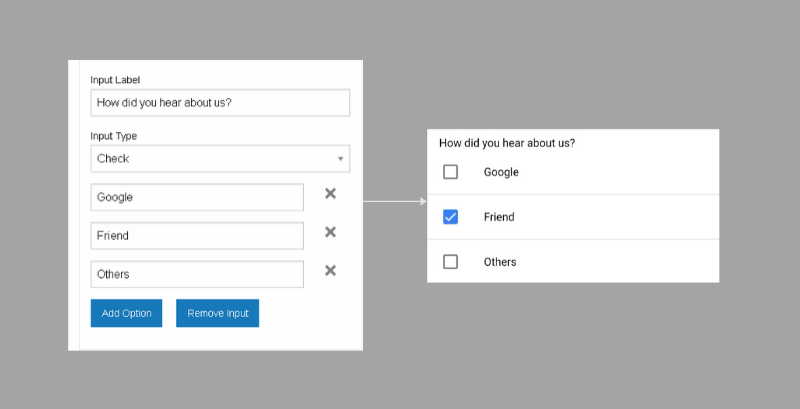
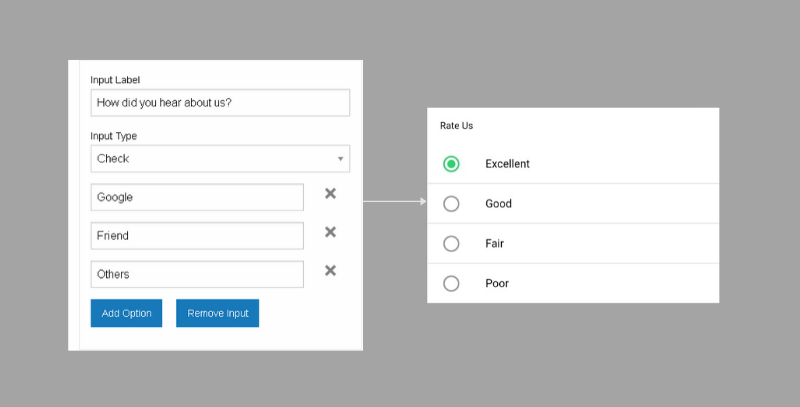
Check is column to choose one or more of several choices. When user has checked one, user can select the other options too. Here is an example in the designer and form results in mobile apps.
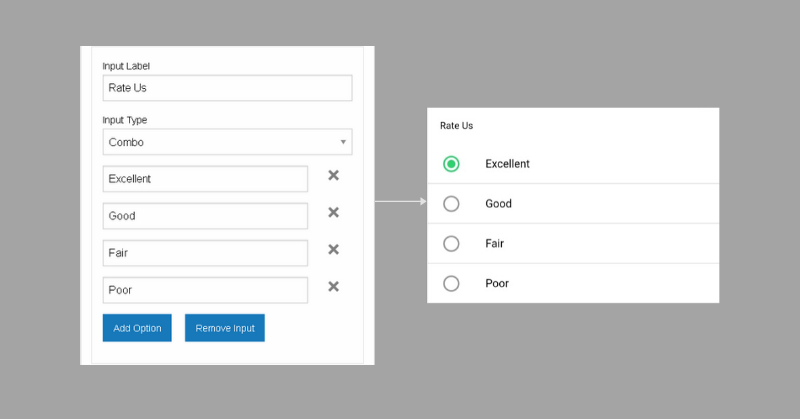
Combo is an input column that can only choose one of several options. Here is an example in the designer and form results in mobile apps.
Send To URL is the target server for sending data that has been inputted by the user. If this column is empty then the data will be sent and saved to the nocortech.com server. If filled, then the data entered by the user will be sent directly by http POST method to your own on premise server.

Target server needs to be added permission Access-Control-Allow-Origin so the data request can sent. Here is an example in PHP to add Allow Origin:
header("Access-Control-Allow-Origin: *");
if($_POST['form']['id']=="012345678"){
*** process script here ***
}
The data sent will have the following format in JSON:
{
	"infoDevice":{
		"device_id":"XXX",
		"device_name":"XXX",
		"device_type":"XXX",
		"ip_address":"XXX.XXX.XXX.XXX",
		"ssid_id":"XXX",
		"latitude":"XXX",
		"longitude":"XXX",
		"user": "XXX",
		"email": "XXX",
		"phone":"XXX"
	},
	"form":{
		"id":"Form ID",
		"name":"XXX",
		"remark":"XXX"
	},
	"content":{
		"Name":"XXX"
	}
}
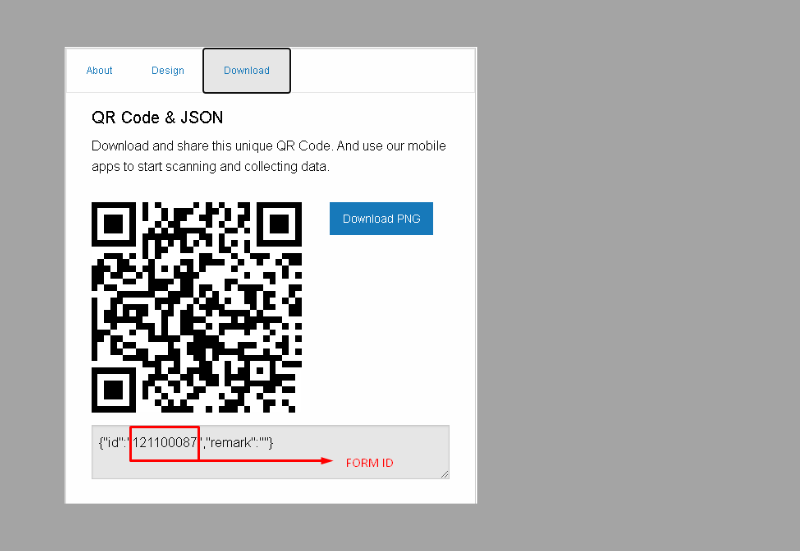
Form ID can be seen through the dashboard on the download tab in the detail form. This ID is unique and vary with other forms. So you can use this as an identifier on your on premise server.
Response Type has two options, namely Direct Reply and Waiting Feedback From Your App. Direct Reply makes the mobile app display the success message without waiting for a response from your on-premise server. Whereas Waiting Feedback From Your App makes the mobile app accept the response results and process it again.
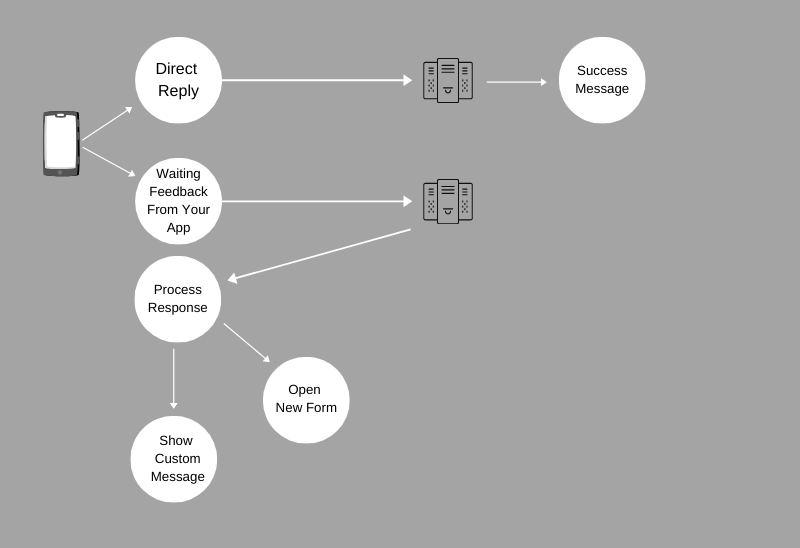
Message can be customized if you want to display other information. And can also display other form after the initial form is complete. Here is an example in JSON response which will show the custom message or open new form when you write the response from your on-premise server.
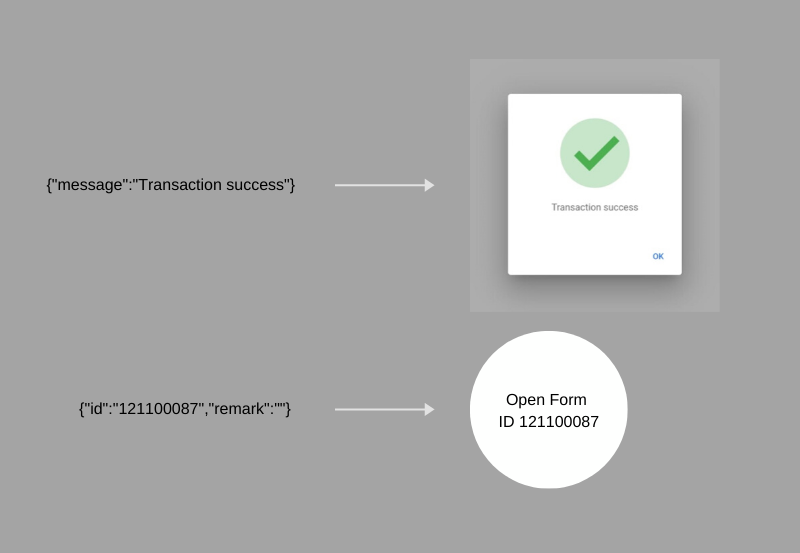
To customize the icon, use icon attribute in your response:
{message: "Transaction success", icon: "success"}
or
{message: "Transaction fail", icon: "fail"}
ID is a variable that can be used to connect the first form with the new form and will be sent again on the new form that has been processed. ID data structure is varchar.
Report is an additional facility. The scan data will go into report by default if column Send To URL on the form is empty, summary of scan collected per month per user. Form creator can download this report in the menu Report.
Link also an additional facility so we can merge external program through html frame and send parameter uid, longitude and latitude. For example if we add link : domain.com, then after user click open link. Then the pop up html frame will show up and access domain.com added by parameter uid, longitute and latitude become:
domain.com?uid=xxx&longitude=xxx&latitude=xxx
© Nocortech